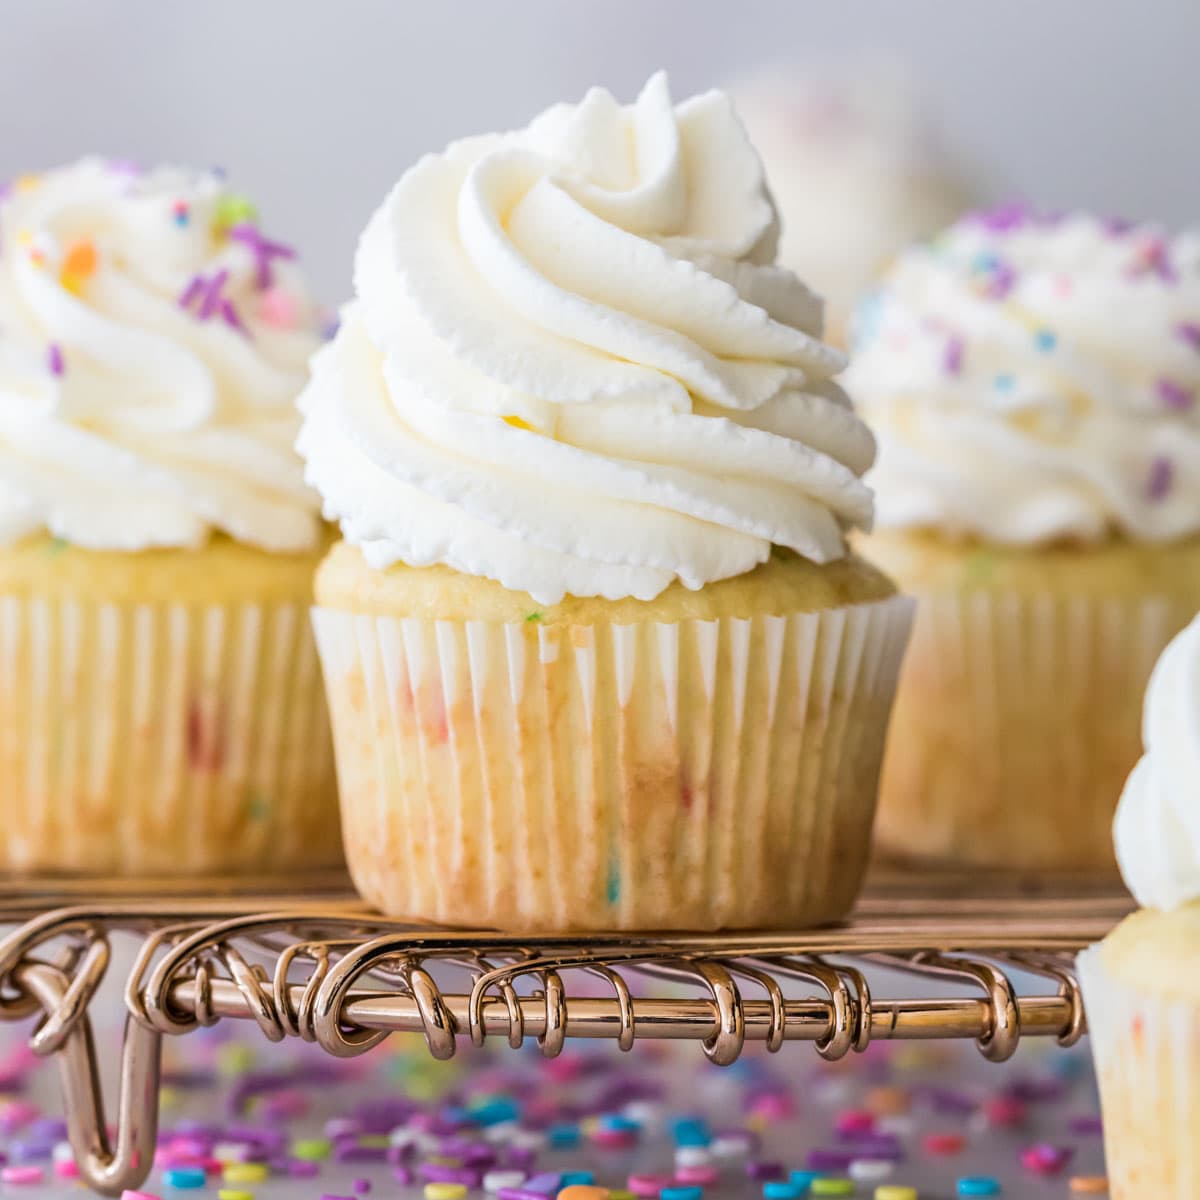
Stabilized Whipped Cream Frosting: The Secret to No-Melt Cakes
Imagine serving a beautifully decorated cake, crowned with billowy, light whipped cream, only to watch it slowly melt, slump, and slide off as the party progresses. It's a common baking heartbreak, especially on warmer days or when desserts need to travel or sit out for more than an hour. The dream of a pristine, elegant dessert can quickly turn into a sticky, deflated reality. But what if there was a way to enjoy that airy, not-too-sweet texture of whipped cream without the worry?
Enter
stabilized whipped cream frosting: the revolutionary technique that transforms simple whipping cream into a robust, pipeable, and wonderfully resilient topping. This isn't just a dollop of cream; it's a true frosting that can stand up to the challenge, holding its shape, resisting heat, and making your cakes, cupcakes, and desserts look professionally finished and taste heavenly, bite after bite.
The Common Challenge: Why Whipped Cream Wilts
At its heart, traditional whipped cream is an emulsion of fat and air. When you whip heavy cream, you're essentially trapping countless tiny air bubbles within the network of milk fat globules. This delicate structure is what gives whipped cream its characteristic lightness and volume. However, this structure is inherently fragile. Heat causes the fat to soften and release the trapped air, gravity pulls the moisture out, and over time, the air bubbles collapse, leading to a runny, weeping mess.
For desserts that are served immediately, a simple mix of cream, sugar, and vanilla is perfectly adequate. But for ambitious projects like towering layer cakes, intricately piped cupcakes, or even a simple fruit tart that needs to last beyond the first serving, you need something more. You need a structural reinforcement – a stabilizer – to ensure your beautiful creation stays just that: beautiful.
Unlocking Stability: The Magic of Stabilized Whipped Cream Frosting
The secret to a triumphant, no-melt
whipped cream frosting lies in introducing a stabilizer. These clever ingredients work to reinforce the fragile fat-and-air matrix, making it much more resistant to heat, time, and the inevitable forces of dessert-destroying gravity. With a stabilized frosting, you gain:
- Incredible Structure: Pipe intricate swirls, create elegant borders, and layer cakes with confidence.
- Heat Resistance: Say goodbye to sliding frosting on warm days or during transport.
- Extended Shelf Life: Prepare desserts the night before without fear of collapse.
- Versatility: Perfect for everything from delicate trifles to robust layered cakes, holding up beautifully under fruit, chocolate, or even light fondant decorations.
- Superior Texture: Retains its light, ethereal quality while gaining a comforting firmness.
This transformation allows you to harness the delicate flavor and less-sweet profile of whipped cream, making it a dream frosting for richer cakes where traditional buttercream might feel too heavy.
Choosing Your Powerhouse Stabilizer: Pudding, Gelatin, or Powdered Milk?
The world of stabilized
whipped cream frosting offers a few excellent choices, each with its own advantages. The best stabilizer for you often depends on your specific dessert, the desired shelf life, and even personal preference for flavor and texture. For an in-depth comparison to help you make the perfect choice, explore our guide on
Pudding vs. Gelatin: Choosing Your Best Whipped Cream Stabilizer.
Here's a breakdown of the most popular options:
1. Instant Pudding Mix
- How it Works: Instant pudding mixes contain starches and gums that thicken when hydrated, providing a stable, creamy body to the whipped cream.
- Pros:
- Effortless: Simply whisk the dry pudding mix directly into your heavy cream. No blooming or heating required.
- Flavor Boost: Vanilla instant pudding is a popular choice, adding a subtle, nostalgic vanilla flavor that many find comforting, reminiscent of classic childhood desserts. Other flavors can be used for creative variations.
- Sweetness: Adds a touch of extra sweetness, which might mean you can reduce the amount of powdered sugar slightly.
- Ideal For: Cupcakes, sheet cakes, desserts that need to hold for a few hours at room temperature or overnight in the fridge. It offers good stability for most home baking needs.
2. Unflavored Gelatin
- How it Works: Gelatin, a protein derived from collagen, forms a strong, invisible matrix when it sets. This matrix traps moisture and air, creating an incredibly firm and stable structure.
- Pros:
- Maximum Stability: Unbeatable for extreme conditions, such as very warm weather, long transportation, or desserts requiring maximum structural integrity. It helps the frosting maintain its shape even under the weight of fruit or light decorative elements.
- Smooth Finish: Tends to yield a slightly smoother, almost silky finish compared to pudding-stabilized cream.
- Neutral Taste: When properly prepared, unflavored gelatin adds no discernible taste to your frosting, allowing the pure flavor of the cream and vanilla to shine.
- Considerations: Requires a bit more preparation (blooming in cold water, then gently heating until dissolved, and cooling before adding to cream). It's crucial to ensure the gelatin mixture is completely cool before incorporating it to avoid melting the cream.
- Ideal For: High-stacked layer cakes, desserts that will be exposed to warmer temperatures, or any application where absolute firmness and long-lasting shape are paramount.
3. Powdered Milk
- How it Works: Adding powdered milk (or milk powder) increases the milk solids content in your cream. These extra proteins contribute to a stronger, more stable foam when whipped, helping to maintain structure.
- Pros:
- Neutral Taste: Like gelatin, powdered milk generally doesn't alter the flavor of your whipped cream, making it a great choice for delicate flavors.
- Good Stability: Provides excellent sturdiness for piping and layering without the extra steps of gelatin.
- No Sour Notes: A preferred alternative to cream of tartar, which some find can introduce a slight sourness.
- Ideal For: Cakes and cupcakes that need a good, pipeable structure with a clean, unadulterated whipped cream flavor.
The Art of Perfect Whipped Cream Frosting: Essential Techniques
Regardless of the stabilizer you choose, mastering the fundamental techniques of whipping cream is crucial for success. These steps ensure your
whipped cream frosting is light, airy, and structurally sound. For more detailed instructions on achieving the perfect consistency, refer to our guide:
Whip It Right: Secrets for Pipeable, Stackable Whipped Cream Frosting.
1. The Cold Imperative
Always start with everything as cold as possible. Place your mixing bowl (preferably stainless steel or glass) and beater attachments in the freezer for 10-15 minutes before you begin. This helps the cream stay colder longer, allowing it to aerate more quickly and reducing the risk of overwhipping, which can lead to a grainy texture.
2. Cream Selection Matters
Choose high-quality
heavy whipping cream with a minimum fat content of 36%. Some labels might just say "heavy cream" or "whipping cream" – always check the fat percentage. A higher fat content is vital because it's the fat globules that trap the air, forming the stable structure. Lower-fat creams simply won't whip to the same firm, pipeable consistency and are more prone to collapsing.
3. Whipping Wisdom
- Start Cold, Stay Cold: Pour your well-chilled heavy whipping cream into the frozen bowl.
- Begin Slowly: Start whipping on medium speed. This allows the cream to gradually incorporate air without overshooting too quickly.
- Soft Peaks Are Key: Continue whipping until soft peaks form. This is the point where the cream starts to hold its shape, but the peak will gently flop over when the beater is lifted. This is the perfect moment to add your dry ingredients.
- Sweeten and Flavor: Stop whipping and add sifted powdered sugar (to prevent lumps) and pure vanilla extract (or other flavorings).
- Introduce Your Stabilizer:
- If using instant pudding mix or powdered milk, sprinkle it over the cream along with the powdered sugar.
- If using cooled gelatin mixture, drizzle it in a steady stream while the mixer is running on low speed. Ensure the gelatin is completely cool but still liquid.
- Finish Whipping: Increase the speed to medium-high and continue whipping until the cream reaches stiff peaks. The peaks should stand straight up when the beater is lifted, and the frosting should be firm enough to hold its shape without collapsing. Be careful not to overwhip, which can separate the cream into a grainy, buttery consistency.
4. Flavor Enhancements
While vanilla is classic, don't hesitate to experiment! A touch of almond extract, citrus zest, or even a spoonful of cocoa powder can transform your
whipped cream frosting into a bespoke delight. Just ensure any liquid extracts are added with the vanilla, and dry additions are sifted with the powdered sugar.
Beyond the Cake: Versatile Uses for Your Stabilized Masterpiece
The beauty of stabilized
whipped cream frosting extends far beyond just decorating cakes and cupcakes. Its enhanced stability opens up a world of culinary possibilities:
- Layered Cakes: Build tall, impressive cakes with confidence, knowing your frosting will provide solid support.
- Cupcake Frosting: Pipe beautiful swirls and rosettes that won't melt away at a party.
- Trifles and Parfaits: Layer with fruit and cake without fear of the cream sinking or weeping overnight.
- Tarts and Pies: Create elegant toppings for fruit tarts, chocolate pies, or lemon meringue, ensuring they look pristine even after chilling.
- Cream Puffs and Eclairs: Fill delicate pastries with a stable, delightful cream that holds its structure.
- Fruit Desserts: A perfect accompaniment to fresh berries, fruit salads, or pavlovas, where its lightness complements natural sweetness.
Properly stored in an airtight container in the refrigerator, stabilized whipped cream frosting can last for 2-3 days, ready to elevate any dessert.
Troubleshooting Common Stabilized Whipped Cream Challenges
Even with the best intentions, baking can sometimes present unexpected hurdles. Here are a few common issues and quick fixes for your stabilized
whipped cream frosting:
- Too Soft/Not Holding Shape: If your frosting feels too soft, try whipping it for another minute or two on medium-high speed. If it still doesn't firm up, you might need a tiny bit more stabilizer. For pudding, add another teaspoon of dry mix; for gelatin, ensure it was fully bloomed and cooled before adding.
- Grainy Texture: This usually indicates overwhipping. Once cream turns grainy, it's difficult to salvage, as the fat has started to separate. Next time, watch carefully and stop as soon as stiff peaks form. Sifting your powdered sugar diligently also helps prevent a grainy texture.
- Weeping/Releasing Liquid: While stabilizers significantly reduce weeping, it can still occur if the cream isn't sufficiently stabilized or if it's exposed to high humidity or warmth for too long. Ensure your stabilizer is properly incorporated and try to keep your finished desserts chilled.
Embracing the art of stabilized
whipped cream frosting truly unlocks a new level of confidence and creativity in your baking. No longer will you dread the prospect of a melting dessert. Instead, you'll be able to create stunning, delectable treats that not only taste amazing but look picture-perfect from the first bite to the last. So go ahead, whip up a batch, and discover the secret to no-melt cakes!